Upgrade to Windows 11 on Unsupported PCs
As this tutorial involves using a PC not supported by Windows 11, I’m not responsible for lost personal data in the situation something goes wrong.
This tutorial will demonstrate the easiest way to upgrade an earlier version of Windows to Windows 11 with the use of a batch file. This particular method will work with any PC that has an unsupported TPM (or no TPM at all), and PCs with an unsupported CPU.
Step 1: Download the Bypass Batch File
This tool contains one batch file called Skip_TPM_Check_on_Dynamic_Update.cmd which is located in the bypass11 folder. You can download the Media Creation Tool here. In the Github repo, just click the green ‘Code’ button and download the code as a .zip file.
Take the ‘Skip_TPM_Check_on_Dynamic_Update.cmd’ file and copy it to the device you want to upgrade to Windows 11.
Step 2: Launch the batch file on the upgrade PC
What this batch file specifically does is skips the entire Dynamic Update process, which includes the checks for a TPM and a supported CPU. When you open it, it will perform a script on Windows PowerShell. A UAC prompt requesting admin access will appear which you should accept.

Batch file in File Explorer

UAC Prompt
If the batch file shows the following prompt below with a green line, that means the unsupported PCs patching was successful. You only need to launch this file once.:

Skip TPM + CPU check batch file
Step 3: Launch the Windows 11 Setup and Upgrade!
Now with the patches out of the way, we can finally open Windows Setup. If you don’t have a Windows 11 ISO, you can download it from Microsoft’s website here:
https://www.microsoft.com/software-download/windows11
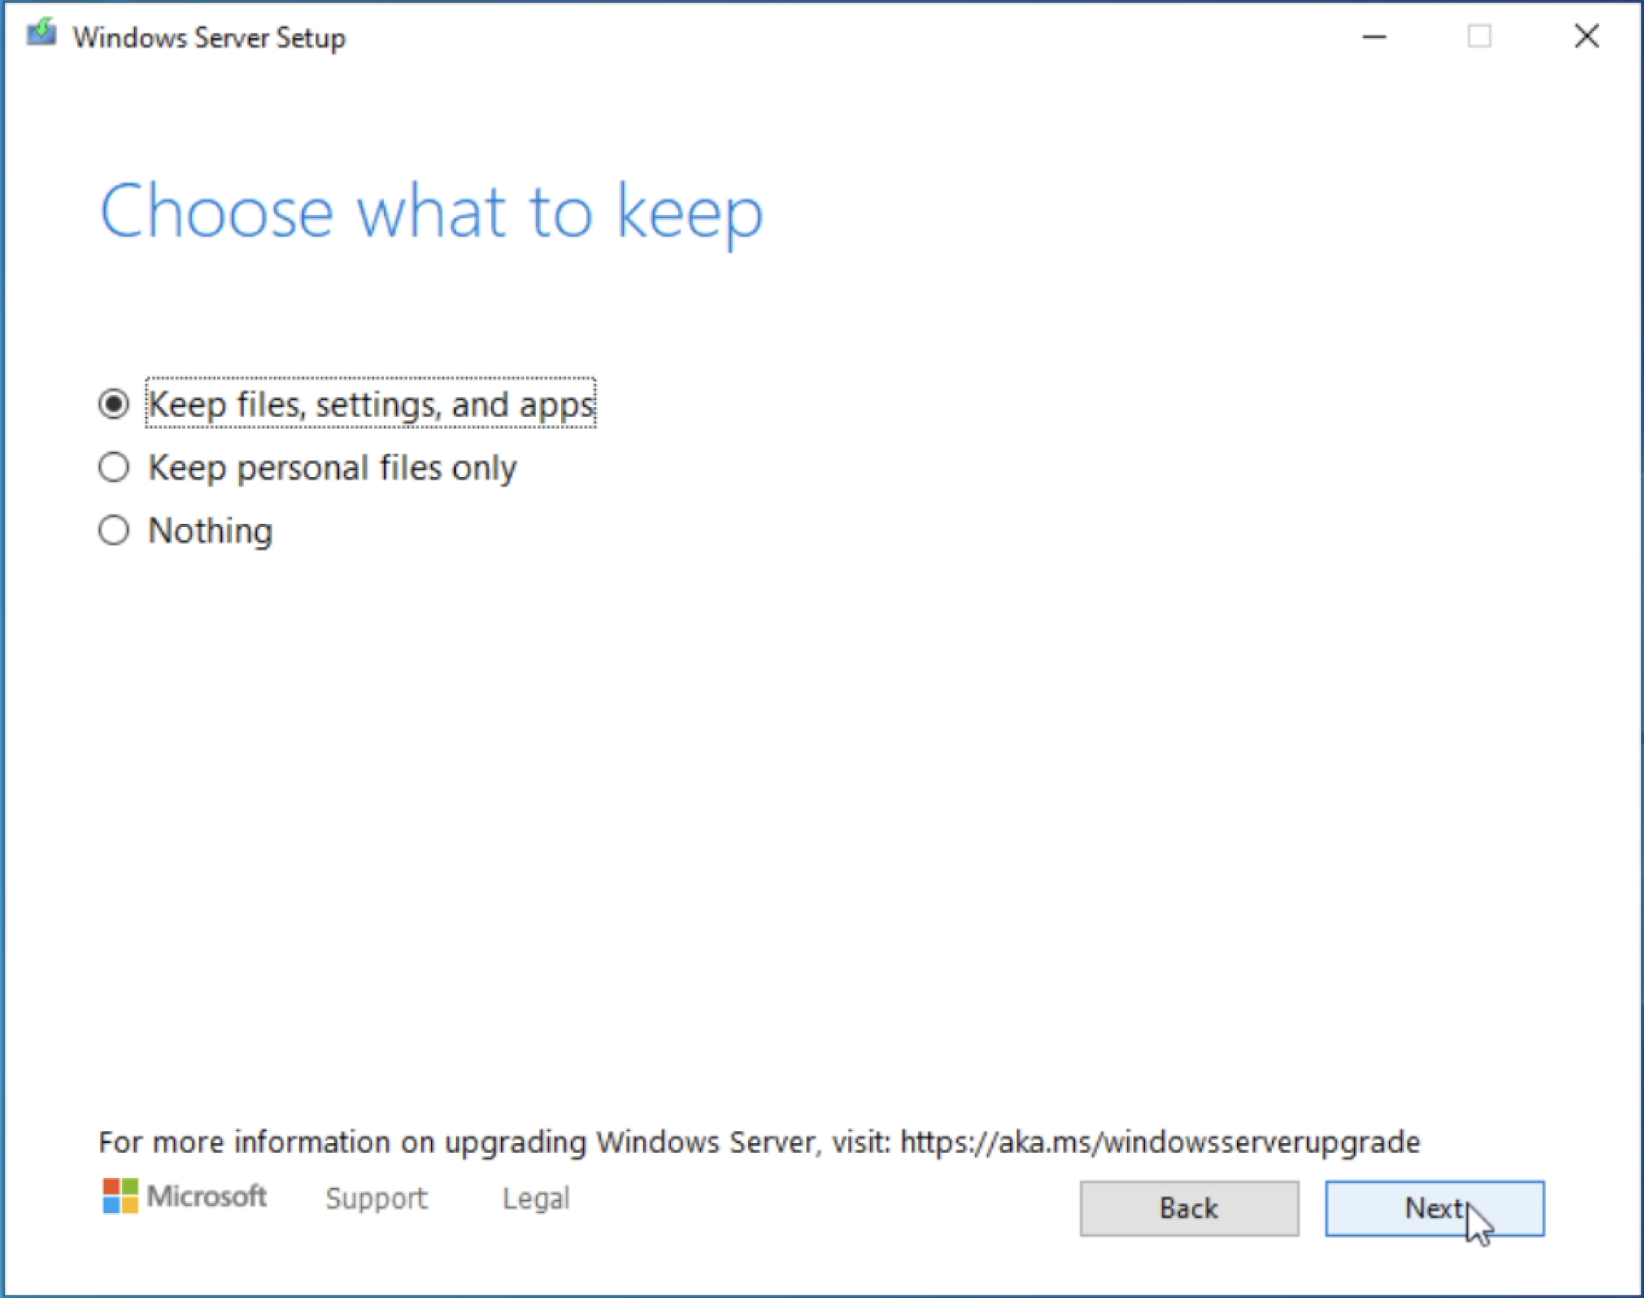
When you open the Setup program, note that on the left it says ‘Windows Server Setup’. This is normal, as the batch file makes the setup use the Server install protocol which skips dynamic update. This isn’t anything to worry about. You're still installing the real Windows 11.

Afterwards you may be asked which version of Windows 11 you want to install, such as 11 Home or 11 Pro.

Next you can read and agree to the terms and conditions!

At this point, a full upgrade allows us to keep all personal files, settings and programs, so you can click that option.
Now you can finally upgrade to Windows 11 by pressing the ‘install’ button!

At this point, the entire screen will turn blue and you will see large text that says ‘Installing Windows Server’. Once again, this is normal. Don’t worry about it. It’s still Windows 11 you are installing. You can now take a break for up to an hour, the rest of the process is entirely automated. Just do not turn off your PC otherwise the upgrade will be cancelled and Windows will roll back to the previous system.

Once the upgrade is complete, you will be greeted with the Windows 11 UI including the Start Menu and a new wallpaper!

Final Note:
Cumulative software updates are not guaranteed due to having an unsupported PC. This basically means you have to wait until the latest Windows 11 ISO is released, and then upgrade again.
Thanks for checking out this tutorial. If you have any questions or feedback, contact me at management@martinnobel.com