How to set up Windows 11 without a Microsoft Account
Introduction:
When Windows 11 was released by Microsoft in October 2021 last year, the Home version of the OS required a Microsoft account when setting up the computer for the first time. This meant that if you didn’t have an internet connection at the time of setting up your device, you wouldn’t be able to use the system at all. And now this requirement is being beta tested in Windows 11 Pro as well with recent Insider Preview builds (particularly 22557 and above).
Not everyone agrees with this. Certainly not sysadmins or work professionals that need to make local accounts for their devices on a bulk scale. It isn’t beneficial to privacy activists – besides, who actually wants more telemetry for their system anyway? This tutorial will provide you a way to skip Windows 11’s Microsoft account requirement at OOBE, which means you can set up your device with a local account. No internet connection necessary.
What is OOBE?:
OOBE refers to the Out Of Box Experience, Microsoft’s special name for Windows first time setup. It is the first thing that Windows opens when you start a new computer for the first time, or when you complete a clean installation of Windows. OOBE allows the user of the device to create their user account, select their keyboard layout, set regional location, connect to Wi-Fi (if needed) and for more advanced users, link the system to an intranet domain (such as those involved with the education market).
Below is a photo of what Windows 10’s latest OOBE looks like, compared to Windows 11’s OOBE. The first part of both OOBEs focuses on selecting your region and keyboard layout.

Windows 10 OOBE (version 21H2)
Windows 11 OOBE
What’s a Microsoft Account?:
A Microsoft account is an account that gives you access to core Microsoft online services.. It allows you to use features such as the Microsoft Store, Outlook and Microsoft Office 365 (if you have an active subscription). Microsoft accounts can be either created for free, or provided by your company or educational institution.
What’s the difference between Windows 11 Home and Pro?:
Home: Windows 11 Home was designed for home/consumer computers which are usually more low-end and are best for families. Some features of Windows 11 Home include Find my device, Windows Defender (built-in anti-virus), secure boot, Windows Security and Parental Controls.
Pro: Windows 11 Pro, on the other hand, has been designed for professionals and corporations. Some of the features on this version of Windows include Group Policy, Hyper-V virtual machine capabilities, Azure support, Active Directory, BitLocker encryption, and much more. Most of the professional features are specifically designed for businesses, not necessarily individuals.
Are mandatory Microsoft accounts already in Windows 10 Home?:
Yes. Since the earliest leaked (21996) build up to the current RTM version, Microsoft accounts are required to set up your device. This means this tutorial will work for all Windows 11 Home versions.
When will mandatory Microsoft Accounts be put into Windows 10 Pro?:
The expected release date of the next major version of Windows 11 (version 22H2) is believed to be October 2022. The development release for 22H2 is known as Nickel, compared to the RTM build which was released in October 2021 and is called Cobalt.
Step 1: Go through the OOBE as usual
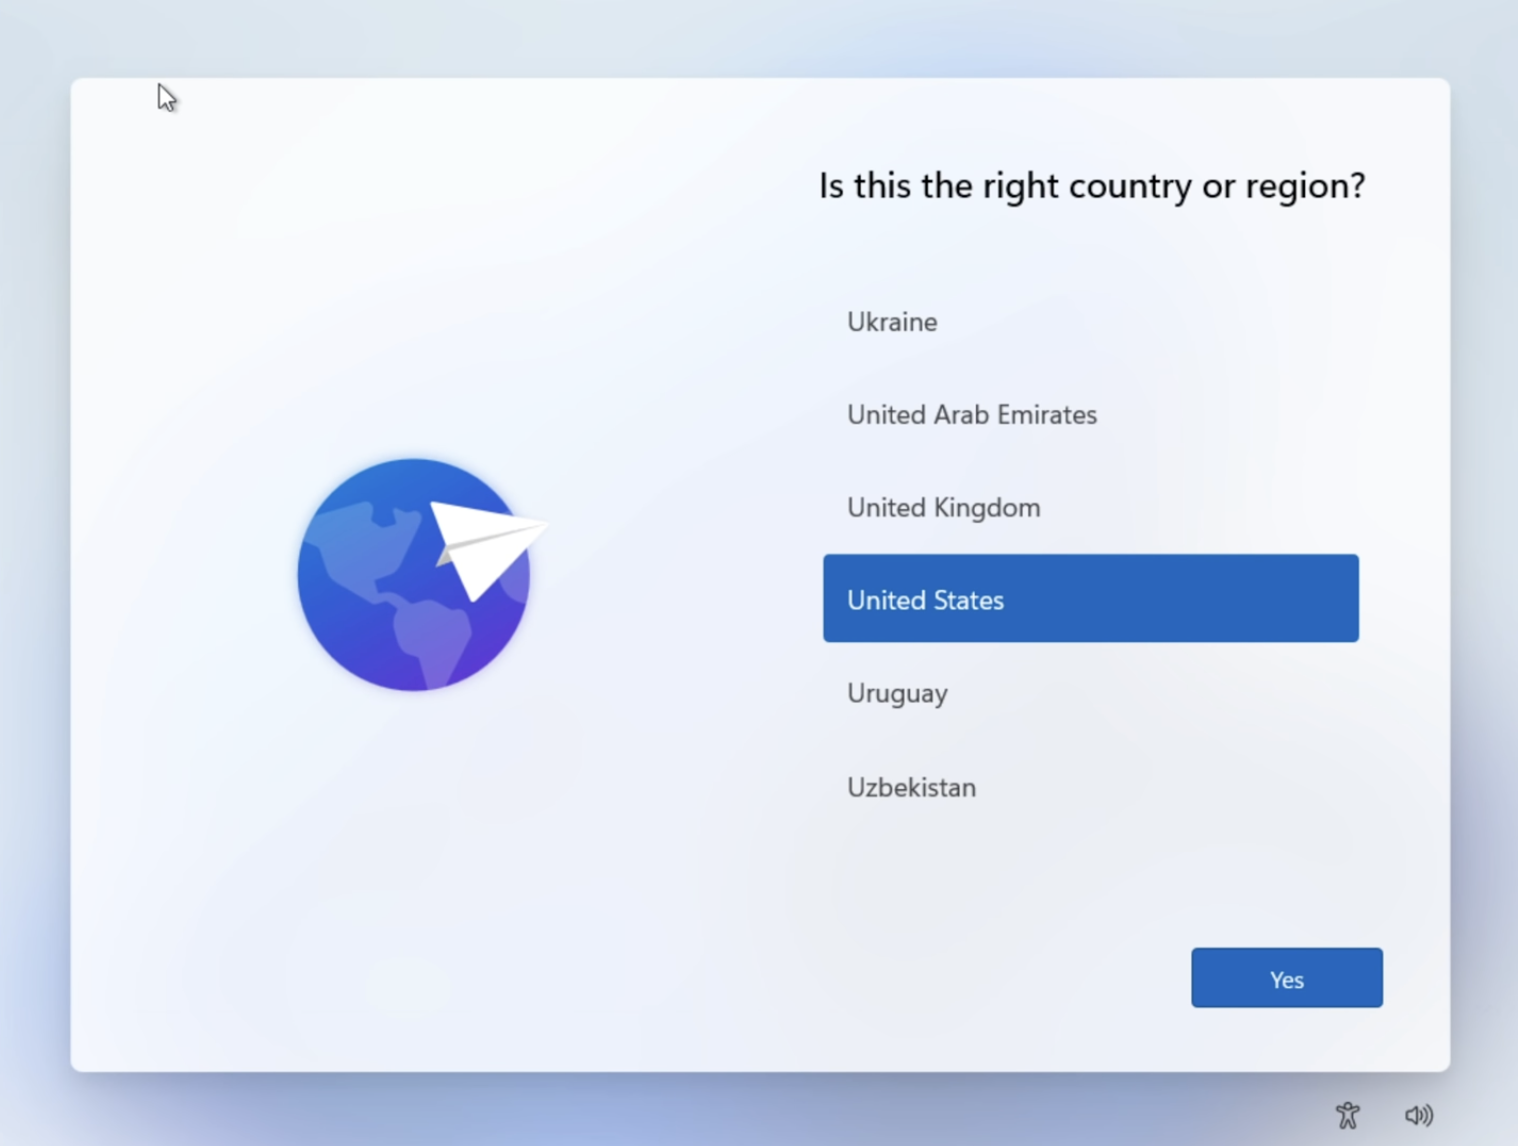
Follow the Windows 11 OOBE until you reach the final prompt in the last photo. The first prompt tells you to select your current location, whether it’s the United States, Australia or any other country.
The second prompt tells you to select your keyboard layout, whether it’s a US layout, Europe or anything else. Then you will reach the final prompt in the third screenshot.


As you can see, Windows tells you it ‘requires an internet connection’ to continue setting up your PC, and there are no additional options. Windows also tells you to visit their website for network troubleshooting. At this point, it’s time to move on to Step 2.
Step 2: Bypass the local account
A neat way to access the Command Prompt during Windows OOBE is by pressing Shift and F10 at the same time. At this point, you just need to type the following commands in order. Press the return key after each command is typed in.:
cd oobe
bypassnro

The screen should immediately turn to black showing the ‘Just a moment’ text with the loading animation shown below:

This process will restart your device, so don’t worry. It will take around 2-4 minutes to take you back to the main OOBE screen.
Step 3: Create your Local Account
Once you reach the OOBE screen again, continue by redoing the parts in Step 1, except when you reach the ‘Let’s connect you to a network’ part. If you can see text that says ‘I don’t have internet’, that means the bypass was successful. The OOBE no longer requires an internet connection to complete setup!

Then on this page, click on ‘Continue with limited setup’:

Now you can put in your local username, followed by your password. No Microsoft Account necessary!

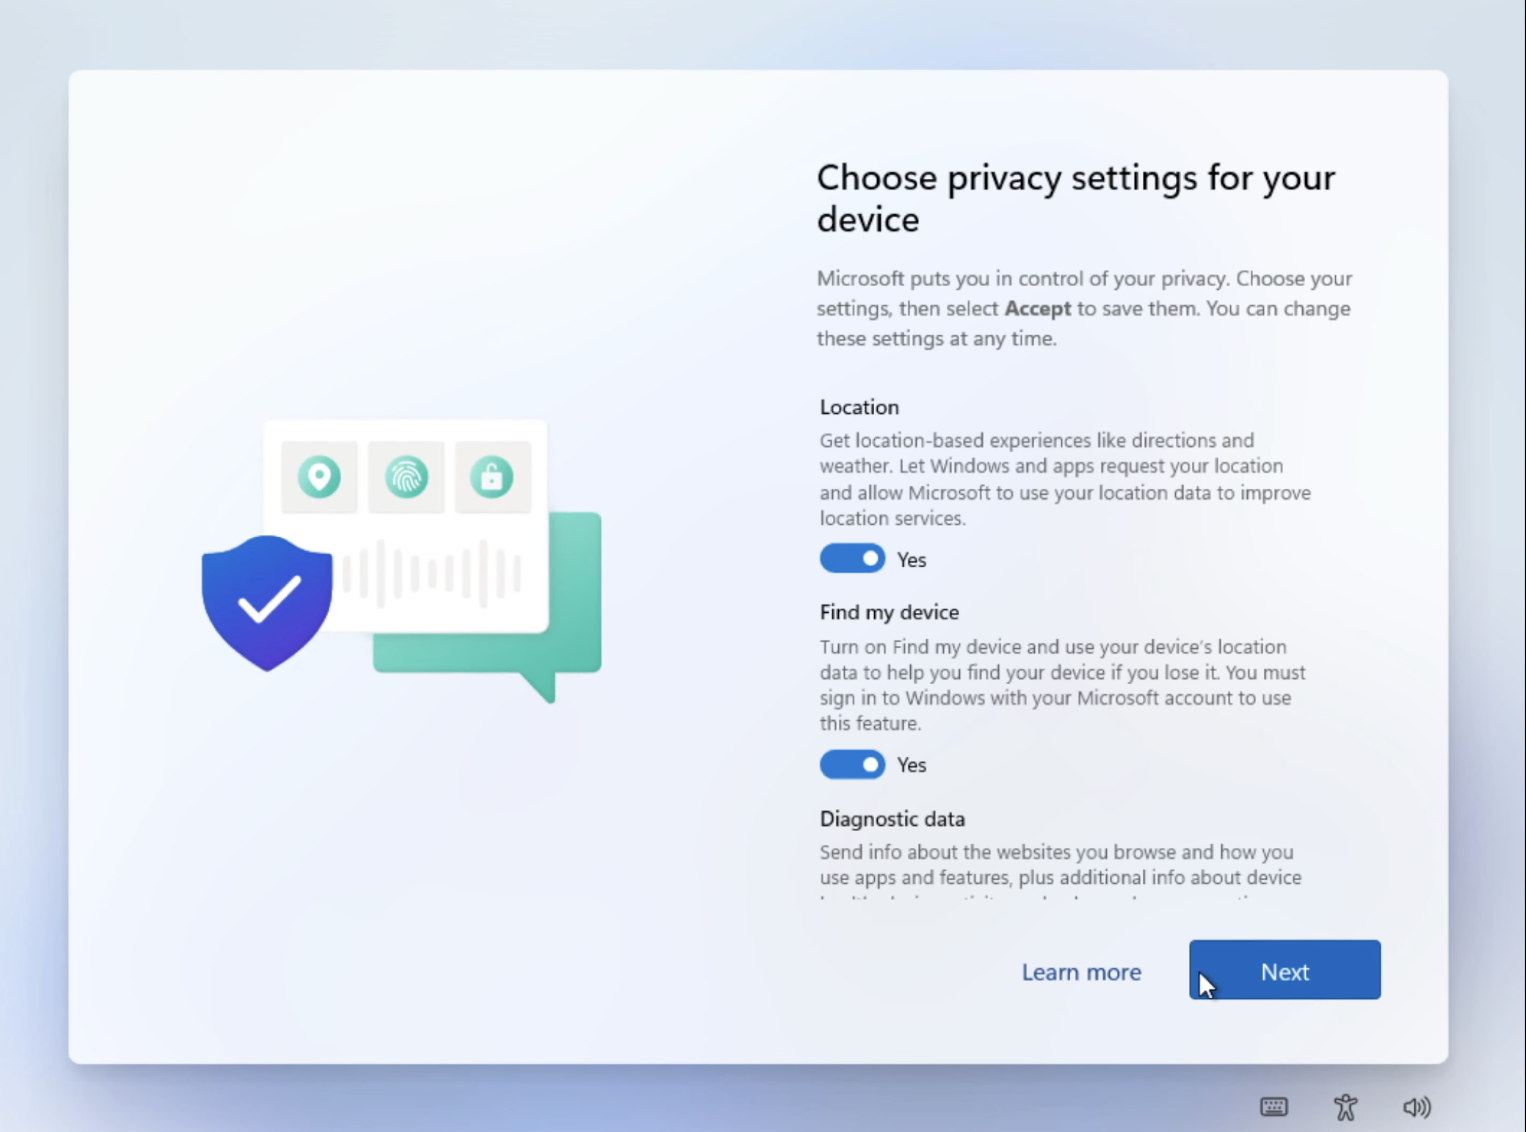
You can then set your privacy settings for your device such as location, find my device, diagnostic data and any additional telemetry options.
Afterwards, you are automatically logged into your newly created local account. You did it!

So this is how you can set up Windows 11 Home or Pro without a Microsoft account, and as a result create a local account without any use of the internet.
If you have any questions or feedback, email me at management@martinnobel.com.